
Imagine the joy of indulging in a homemade strawberry ice cream cone, where the flavor of sun-ripened strawberries bursts forth in a dance of sweetness and cream. As a refreshing summer treat, the allure of crafting your very own delicious strawberry ice cream cone becomes a cherished seasonal ritual. This strawberry ice cream cone recipe not only offers a delectable escape from the warmth of summer days but also weaves moments of shared delight and gourmet pride right from your kitchen.
Whether you’re yearning for a sweet summer treat or simply eager to flex your culinary skills, making a homemade strawberry ice cream cone is about more than following a recipe; it’s about creating memories. As we walk you through the pursuit of perfecting your cone, from selecting the juiciest strawberries to crafting the final refreshing masterpiece, your kitchen will be suffused with the promise of summer’s sweet bounty.
Table of Contents
Introduction to Homemade Strawberry Ice Cream
Embarking on the journey to create your own homemade strawberry ice cream is both exciting and rewarding. Imagine the delight of enjoying a delicious ice cream dessert that’s been crafted in your own kitchen, using fresh, wholesome ingredients. Not only is this homemade ice cream recipe simple, but it’s also free from the artificial additives often found in commercial products.
With just a few basic ingredients—ripe strawberries, sugar, and dairy—you can whip up a fruity frozen treat that epitomizes the taste of summer. The beauty of making homemade strawberry ice cream is in its versatility. Whether you prefer your ice cream less sweet, or bursting with the flavor of strawberries, you can adjust the recipe to suit your taste.
Here, we’ll guide you through the essentials of crafting that perfect scoop of strawberry ice cream, ensuring that every bite is dense, creamy, and full of flavor. So, grab your apron, and let’s make a batch of what could possibly be your new favorite dessert!
Choosing the Best Strawberries for Your Ice Cream
When it comes to crafting the perfect batch of fresh strawberry ice cream, selecting the right strawberries is critical. The quality of the fruit determines not only the flavor but also the overall satisfaction of your fruity ice cream desserts. This guide will help you choose the best strawberries to ensure your refreshing ice cream treats are irresistibly delicious.
Why Ripe Strawberries Matter
Ripe strawberries are the cornerstone of any great strawberry ice cream. These berries are naturally rich in sugars and have a deep, intense flavor, which is crucial since freezing can dull flavors. Ripe or even slightly overripe strawberries will enhance the taste of your ice cream, making each spoonful a vibrant and flavorful experience.
How to Pick the Perfect Strawberries
Picking the ideal strawberries for ice cream isn’t just about grabbing the reddest ones you can find. Here are a few tips to ensure you get the best:
- Look for deep red color: Strawberries without white or green near the stem are generally fully ripened.
- Smell the fruit: Strawberries that have a strong, sweet smell are likely to be full of flavor, perfect for a batch of homemade ice cream.
- Check for firmness: While slightly soft berries are good, overly mushy strawberries should be avoided as they can be overripe.
By selecting the best strawberries, you’re setting the stage for a delightful treat that captures the essence of summer in every bite.
Strawberry Ice Cream Cone Recipe Essentials
Embarking on your journey to create the perfect easy strawberry ice cream cone recipe starts with gathering the right ingredients for a truly delicious ice cream flavor. The cornerstone of this creamy strawberry dessert is undeniably the fresh strawberries, which when combined with traditional ingredients like whole milk and heavy cream, transcend into a delectable treat. Here’s a straightforward overview of what you’ll need to whip up this delightful dessert.
- Fresh strawberries
- Whole milk
- Heavy cream
- Granulated sugar
- Vanilla extract
- Salt
- Optional: Red food coloring for enhanced color
Begin by blending the strawberries to a puree, mixing them with sugar, whole milk, and heavy cream to ensure the base is rich and creamy. A hint of vanilla enhances the depth of flavors while a pinch of salt balances the sweetness. For those who love a vibrant dessert, a few drops of red food coloring can be added to achieve a lush pink hue. The mix should then be churned in an ice cream maker until it reaches a soft, creamy consistency. Once churned, transfer this mixture into an airtight container and let it firm up in the freezer to perfect your creamy strawberry dessert.
With these essentials, you’re well on your way to enjoying an easy strawberry ice cream cone recipe that promises to be a delightful indulgence on warm days or a sweet treat anytime you desire.
Step-by-Step Guide: Preparing Your Strawberries
Embark on the journey to creating your very own fresh strawberry ice cream with a crucial first step: preparing your strawberries meticulously. This initial process not only ensures the cleanliness of your fruit but also enhances their taste, paving the way for a refreshing strawberry delight.
Cleaning and Hulling Your Strawberries
Begin by thoroughly rinsing your strawberries under cool, running water to eliminate any dirt or impurities. Take care to gently rub the surfaces without bruising the fruit. After cleaning, it’s time to hull the strawberries. This means removing both the leafy green cap and the white core, which can be bitter. Use a paring knife or a dedicated strawberry huller to do this efficiently while preserving as much of the fruit as possible.
Macerating Strawberries for Enhanced Flavor
Once your strawberries are cleaned and hulled, enhance their natural flavors through maceration. Coating the strawberries with sugar is the key here. Depending on the sweetness of your berries and your taste preference, adjust the amount of sugar. Allow them to sit for at least 30 minutes; during this time, the sugar draws out the juices from the strawberries, creating a rich syrup imbued with concentrated strawberry essence. This step is not just about sweetening; it intensifies the berry’s flavor, making it perfect for blending into your fresh strawberry ice cream.
By following these meticulous steps to prepare your strawberries, you set the stage for a truly homemade, refreshing strawberry delight that brings a burst of real fruit flavor to every scoop of your ice cream.
Mixing Your Base: Ingredients and Techniques
Crafting the perfect batch of creamy strawberry ice cream begins with preparing a well-balanced base. Essential to this process is understanding how heavy cream and whole milk contribute to the richness and smooth mouthfeel of your dessert. Here’s a detailed look at how to mix these foundational ingredients to prepare your homemade strawberry ice cream recipe.
The Role of Heavy Cream and Whole Milk
Heavy cream and whole milk are crucial for creating a luxurious texture in your ice cream. The high fat content in heavy cream lends a silky, rich consistency, while whole milk balances the mixture, ensuring your ice cream is not overly dense. For an optional twist, some gourmet recipes also incorporate condensed milk, enhancing the creamy texture without overshadowing the vibrant strawberry flavor.
Combining Ingredients for a Smooth Texture
To achieve the best texture for your creamy strawberry ice cream, begin by pureeing fresh strawberries to a smooth consistency. Mixing this puree with your creamy base of whole milk, heavy cream, and a sweetener of your choice (sugar or honey works well) should be done gradually to prevent any lumps. Once all the ingredients are fully incorporated and smooth, the mixture is ready to be chilled and later churned into the delectable frozen treat you crave.
Remember, the key to a successful homemade strawberry ice cream recipe lies in the balance and quality of ingredients, ensuring each scoop is as delightful as the next. With these techniques, your ice cream will not only taste great but will also have a professional, appealing texture.
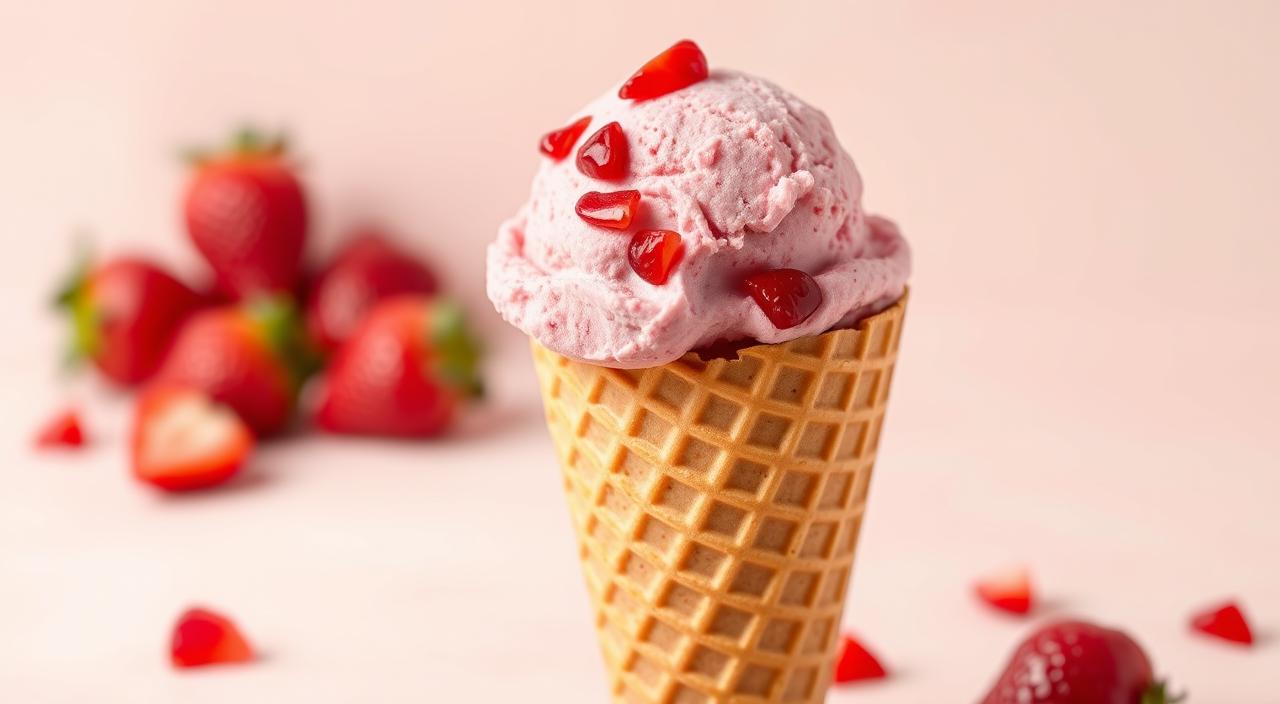
Strawberry Ice Cream Cone
As you conclude the meticulous process of whipping up your homemade best strawberry ice cream cone, the final step involves pairing it with the perfect cone. This completes the creation of a refreshing treat sure to delight. There’s an art to choosing the right cone that balances texture and flavor, elevating your classic strawberry ice cream cone to new heights.
When selecting a cone, it’s crucial to consider its complement to your creamy organic strawberry ice cream cone. Each type of cone brings its unique twist to your dessert experience, from the mildly sweet wafer cones to the rich, crunchy sugar cones. Here’s how you can choose the best match:
- Traditional Cones: These are perfect if you enjoy a subtle crunch that doesn’t overshadow the rich flavors of your strawberry ice cream.
- Sugar Cones: They are thicker and sweeter, providing a delightful contrast to the natural tartness of the strawberries.
- Waffle Cones: For those who love an extra crunch and a hint of vanilla, waffle cones are an excellent choice, adding an artisanal feel to your treat.
To assist you further, consider the following comparative analysis of cone types that might pair best with your strawberry ice cream:
| Cone Type | Texture | Flavor Complement |
|---|---|---|
| Traditional Cone | Light and Crunchy | Mild, does not compete with ice cream flavor |
| Sugar Cone | Crunchy and Sweet | Enhances ice cream sweetness |
| Waffle Cone | Hearty and Crunchy | Vanilla notes complement strawberry |
Selecting the ideal cone for your strawberry ice cream is more than a mere detail—it’s about crafting a full sensory experience. Whether your preference leans towards the classic or something best or organic, ensuring the cone complements the flavor of your ice cream will make every bite enjoyable.
Churning to Perfection: Ice Cream Maker Tips
Creating homemade ice cream is an enjoyable process, particularly when it comes to the churning stage, which is crucial for achieving that creamy, silky consistency. For those looking into how to make ice cream cones at home, understanding churning techniques is key. Selecting the right ice cream maker can greatly affect the process, so let’s dive into how you can find the perfect match for your ice cream making needs and explore some helpful churning tips.
Finding the Right Ice Cream Maker for You
When choosing an ice cream maker, you should consider the volume of ice cream you aim to produce and how user-friendly the device is. A compact maker may be adequate if you are making smaller quantities for family gatherings. However, for larger batches, a more robust machine would be more appropriate. Ensure that the model you choose is well-reviewed for its durability and performance, ensuring it can consistently produce excellent homemade ice cream.
Churning Tips for the Perfect Consistency
Achieving the perfect consistency in your ice cream involves more than just selecting a good quality ice cream maker; it involves meticulous attention to the preparation of your ice cream base. Ensure your ice cream base is well-chilled before you pour it into the maker. This step is paramount because it helps speed up the freezing process, which is essential for preventing ice crystals and achieving a smooth texture.
| Tip | Description | Impact on Ice Cream Quality |
|---|---|---|
| Pre-chill the Base | Chill your ice cream base in the refrigerator for at least 4 hours before churning. | Enhances texture and speeds up the churning process. |
| Use a Timer | Monitor the churning time closely; most ice creams will set within 20 to 25 minutes in the machine. | Prevents overchurning which can make the texture too buttery. |
| Temperature Control | Ensure your freezer is set to the optimal temperature to facilitate proper firming after churning. | Helps achieve a firmer consistency, crucial for cone assembly. |
Remember, the texture of your homemade ice cream can make or break your dessert, especially when learning how to make ice cream cones that captivate with every bite. Follow these tips to refine your technique and achieve perfect results every time.
Alternative Methods: No-Churn Strawberry Ice Cream
If you’re looking to whip up an easy strawberry ice cream cone recipe but lack an ice cream maker, don’t worry. The no-churn method is a straightforward and efficient way to prepare refreshing ice cream treats using simple kitchen tools. This technique not only saves on equipment but also involves ingredients you probably already have at home.
How to Make Strawberry Ice Cream without an Ice Cream Maker
To start, you’ll need some basic ingredients: condensed milk, heavy cream, fresh strawberries, and sugar. First, take the heavy cream and whip it until it forms stiff peaks. In another bowl, mix the condensed milk with pureed strawberries and a splash of vanilla for extra flavor. Gently fold the whipped cream into the strawberry mixture until everything is well combined. This process helps to keep the mixture airy, ensuring that your ice cream is light and creamy once frozen.
Secrets to a Creamy No-Churn Ice Cream
The secret to achieving a creamy texture in no-churn ice cream lies in the fat content of the heavy cream and the air incorporated during the whipping process. To enhance the texture further, you can add a touch of alcohol, such as vodka or rum, which helps in reducing ice crystallization, making the ice cream smoother. Another tip is to ensure that all your ingredients are very cold before you start mixing, which helps in keeping the mixture aerated.
Once your mixture is ready, pour it into a freezable container and freeze it for at least 6 hours or overnight. After freezing, your homemade strawberry ice cream is ready to be served in cones, perfect for a sweet treat on a warm day.
Whether serving up at a family gathering or enjoying a cone in the sunshine, homemade no-churn strawberry ice cream is an excellent addition to your repertoire of sweet treat recipes. It’s not only delicious but also a delightful way to impress guests with your culinary skills.
| Ingredient | Quantity | Role in Ice Cream |
|---|---|---|
| Condensed milk | 1 can (14 oz) | Base for sweetness and creaminess |
| Heavy cream | 2 cups | Creates light, fluffy texture |
| Fresh strawberries | 2 cups, pureed | Adds natural strawberry flavor |
| Sugar | 1/4 cup | Enhances sweetness |
| Vanilla extract | 1 tsp | Depth of flavor |
Assembling Your Strawberry Ice Cream Cones
Embarking on the journey of crafting the perfect top-rated strawberry ice cream cone begins by discerning which cone type amplifies your gourmet ice cream treat best. Whether you prefer the classic simplicity of a homemade strawberry cone or the decadent indulgence of a chocolate-dipped option, selecting the right base is crucial for a harmonious dessert experience.
The art of assembling begins with preparing your ice cream. Ensuring that your homemade strawberry ice cream has softened slightly will facilitate easier scooping. Utilize a scoop warmed under hot water to create beautifully rounded and smooth ice cream scoops. This method enhances the malleability of the ice cream, ensuring it nestles perfectly into your chosen cone without breaking it.
| Cone Type | Description | Best Suited For |
|---|---|---|
| Classic Wafer Cone | Light, crispy texture with a neutral taste that enhances the strawberry flavor. | Traditional enjoyers of a crisp, subtle crunch. |
| Chocolate-Dipped Cone | Rich, smooth, and adds a luxurious chocolate layer. | Lovers of extra sweetness and texture. |

The final touch in assembling your gourmet ice cream treat is all about precision and a bit of flair. Carefully stack the scoops atop one another to achieve height and an alluring visual. Smooth out any imperfections and ensure the ice cream is centered to prevent tipping. Your top-rated strawberry ice cream cone is now ready to serve, promising a memorable homemade delight that’s both visually appealing and deliciously satisfying.
Customizing Your Strawberry Ice Cream Cone
Taking your delicious strawberry ice cream to the next level involves personalizing it with a variety of add-ons and toppings. This customization not only enhances the taste but also turns each cone into an indulgent dessert option that caters to different preferences and occasions. Perfect for summer dessert ideas, playing around with these extras can transform a simple treat into a uniquely tantalizing experience.
Add-ons and Toppings for Every Taste
Whether you’re hosting a party or enjoying a quiet evening at home, the right toppings can dress up your strawberry ice cream in exciting ways. Consider classic options like sprinkles and chocolate syrup or opt for something more unique such as lavender sprinkles or caramelized bananas. Here’s a guide to help you choose:
- Fresh fruits like blueberries or sliced peaches for a refreshing twist
- Crumbled cookies or toasted coconut for added crunch
- Warm sauces such as hot fudge or butterscotch for a lavish flair
- Edible flowers or herbal toppings like basil for a gourmet touch
Creating Your Own Signature Flavors
Infusing your homemade strawberry ice cream with signature flavors allows you to express your culinary creativity and delight your taste buds. Mix in unique ingredients during the ice cream-making process to develop new flavor profiles that will keep everyone guessing and craving more.
| Ingredient | Flavor Profile | Why Try It? |
|---|---|---|
| Chili Powder | Spicy and sweet | For a surprising kick that complements the sweetness |
| Lime Zest | Tart and tangy | To enhance the fruitiness of the strawberry |
| Mint | Fresh and cool | For a refreshing and soothing finish |
By exploring these suggestions, you can turn every scoop of your homemade strawberry ice cream into a canvas for your culinary artistry. Embrace these ideas to create unforgettable summer dessert ideas and indulge in the delicious strawberry ice cream you’ve crafted with love.
Storing Your Homemade Ice Cream
After delighting in the process of creating a delicious dessert with the ripest strawberries, ensuring your refreshing frozen treats last is crucial. Proper storage extends the enjoyment of your summer treat, preserving its texture and flavor. Here’s how you can keep your homemade ice cream in perfect condition.
- Transfer your churned ice cream into an airtight container to shield it from air exposure, which can lead to ice crystals.
- Smooth the surface of the ice cream and then press a layer of cling film directly on it before sealing the container lid. This extra barrier helps prevent freezer burn and keeps your ice cream creamy and scoopable.
- Store the container in the back of your freezer where the temperature is most consistent, thus helping maintain your summer treat’s delightful texture.
How Long Does Homemade Ice Cream Last?
Typically, homemade ice cream maintains its best quality for about one week after it’s made. Over time, it may become firmer and the flavor can crystallize, especially if stored longer. To enjoy the best flavor and consistency, consume it within this time frame. When you’re ready to serve, let the container sit at room temperature for a few minutes to soften, ensuring those perfect scoops for your delicious dessert.
Strawberry Ice Cream Cone: Tips for Serving
Serving your strawberry ice cream cone elegantly is key to enhancing the eating experience and making it a memorable creamy indulgence. A visually appealing presentation not only tantalizes the taste buds but also sets the mood for a perfect summer dessert treat. Here’s how you can elevate your serving style to make your dessert not just delicious but truly picturesque.
How to Present Your Ice Cream Cones
The presentation of your strawberry ice cream cones should scream refreshing dessert. To achieve this, consider using decorative trays or individual cone stands. This not only avoids messes but also stylishly showcases each cone. To further captivate your guests, pair your cones with thematic decorations that complement the season or the occasion.

Making Your Dessert Instagram-Worthy
To turn your strawberry ice cream cones into an Instagram sensation, focus on the garnishes. Edible flowers, a drizzle of rich chocolate sauce, or even a sprinkle of colorful sprinkles can add vibrant colors and textures to your cones. Each element should add to the visual appeal without overpowering the main attraction—the ice cream itself. For that Instagram shot, ensure good lighting and choose a simple yet chic background to make those cones pop in your photos.
- Incorporate contrasts in your presentation with light and dark elements.
- Arrange multiple cones in various angles to create an engaging visual array.
- Use seasonal fruits and edible flowers for a fresh and appealing look.
Conclusion
Making your own fruity ice cream cone is a journey that brings joy and rewards beyond the final sweet strawberry delight. As you’ve explored, creating this perfect summer dessert option in the comfort of your home allows for a fresh, personalized experience that stands out from commercial products. You’ve learned the importance of handpicking ripe strawberries, the significance of a smooth base mixture, and the satisfaction of churning your cream to the right consistency. Whether opting for the traditional churned version or the innovative no-churn alternative, the result is undeniably delicious.
Your homemade strawberry ice cream cone is more than just a treat; it’s a reflection of your dedication to quality and flavor. Each step, from preparing the strawberries to assembling the cone, is an integral part of crafting a memorable dessert. By embracing the nuances of customizing with an array of toppings and sauces, you can create an indulgence that caters to any palate. Remember, the best dessert is one that not only tastes great but also brings a sense of accomplishment and happiness.
As the warm breezes of summer approach, take this knowledge and turn it into action. Gather your ingredients, follow each step carefully, and soon you’ll be able to enjoy and share a homemade fruity ice cream cone that’s nothing short of a sweet strawberry delight. Embrace this timeless summer dessert option, and make your kitchen a place where sweet memories are churned and served one scoop at a time.
FAQ
What ingredients are needed to make homemade strawberry ice cream?
You will need 2 cups of mashed fresh strawberries, whole milk, heavy cream, white sugar, vanilla extract, and a pinch of salt. Optional red food coloring can be added for color.
How long does it take to make strawberry ice cream at home?
The prep time is around ten minutes, and depending on the freezing time required by your ice cream maker, you can enjoy your homemade strawberry ice cream in about an hour.
Why do ripe strawberries matter for making ice cream?
Ripe strawberries contain a higher concentration of natural sugars, offering a burst of flavor that is intensified during the freezing process. They contribute to a richer, more authentic strawberry taste in your ice cream.
How do I pick the perfect strawberries for my ice cream?
Choose strawberries that are ripe and aromatic, with a deep red color. Overripe strawberries are also a good option for their intensified flavors. Ensure they’re fresh and free of any mold or bruising.
Do I need an ice cream maker to make strawberry ice cream?
While an ice cream maker can help achieve a smooth and creamy texture, you can also use a no-churn method that involves whipping condensed milk and heavy cream before folding in the blended strawberries and sugar.
Can I make strawberry ice cream if I’m lactose intolerant?
Yes, you can substitute lactose-free milk and cream to make your ice cream. Additionally, there are dairy-free alternatives like coconut milk, almond milk, or soy milk that can be used to create a creamy base for those with dietary restrictions.
How do I store homemade strawberry ice cream?
Store your homemade strawberry ice cream in an airtight container in the freezer. To prevent ice crystals, you can place a layer of cling film directly on the surface of the ice cream before closing the container. It should last about a week before it starts to harden significantly.
What are some toppings I can use for my strawberry ice cream cone?
You can top your strawberry ice cream with a variety of add-ons such as fresh fruit slices, chocolate chips, sprinkles, nuts, whipped cream, or syrups to cater to different tastes and add an extra touch of indulgence to your dessert.
How do I achieve the perfect scoop of ice cream for my cones?
Allow your homemade strawberry ice cream to soften slightly at room temperature for a couple of minutes. Then, use a warmed ice cream scoop to carve out clean, round scoops that sit well on your cone.
How can I make my strawberry ice cream cones look Instagram-worthy?
Serve your ice cream cones on a decorative tray or individual stands. Add visually intriguing garnishes like colorful sprinkles, edible flowers, or drizzle them with chocolate or fruit sauces to elevate the presentation and make your dessert stand out on social media.
Is it possible to make strawberry ice cream with frozen strawberries?
Yes, you can use frozen strawberries if fresh ones aren’t available. Thaw them at room temperature and drain excess water before using them in your recipe to prevent diluting the ice cream mixture.
Can I make other fruit-flavored ice creams using this recipe?
Absolutely. You can easily swap strawberries for other fruits like peaches, raspberries, or blueberries. Just ensure the fruit is ripe and puree it before adding it to your ice cream base.