Ever felt like making homemade crusty Italian Bread Recipe is too hard? It’s quite simple!
Artisan bread baking isn’t just for pros. With basic ingredients and the right steps, you can make your kitchen smell like a real Italian bakery. This recipe will show you how to make a crusty loaf that’s just as good as store-bought.
Baking bread is more than just throwing ingredients together. It’s about finding the right mix of flour, water, yeast, and technique. Start your bread-making adventure here.
Table of Contents
Key Takeaways
- Master the art of authentic Italian bread at home
- Learn simple techniques for creating a perfect crusty loaf
- Understand the essential ingredients for rustic bread
- Discover foolproof methods for successful bread baking
- Create bakery-quality bread in your kitchen
Understanding the Art of Italian Bread Making
Dive into the fascinating world of traditional Italian baking. Here, bread is more than food—it’s a cultural treasure. Italian bread culture shows centuries of culinary passion and artisan techniques passed down through generations.

The journey of Italian cuisine staples starts with understanding the deep-rooted traditions. Italian bread isn’t just a side dish. It’s a key part of meals that tells a story of regional diversity and culinary expertise.
The History of Traditional Italian Bread
Italian bread-making goes back to ancient Roman times. Bakers developed sophisticated techniques that turned simple ingredients into remarkable culinary experiences. Each region in Italy has its bread style, showing local ingredients and cultural influences.
- Tuscany: Known for pane sciocco, a saltless bread
- Sicily: Produces dense, hearty loaves
- Liguria: Creates focaccia with distinctive olive oil flavors
What Makes Italian Bread Different
Italian bread stands out because of its focus on minimalism and quality. The key differences include:
- Simple, high-quality ingredients
- Long fermentation processes
- Emphasis on natural yeast
- Crisp exterior with soft interior
“Bread is the king of the Italian table, and pasta is its queen.” – Unknown Italian Chef
Essential Characteristics of Authentic Italian Bread
Authentic Italian bread is known for its crisp, golden-brown crust and soft, airy interior. It uses minimal ingredients—flour, water, salt, and yeast—to create a pure, wholesome flavor. This celebrates simplicity.
Understanding these techniques will help you appreciate the art of traditional Italian baking. You can then create exceptional bread in your kitchen.
Essential Ingredients for Crusty Italian Bread Recipe

Making real Italian bread means picking top-notch ingredients. These ingredients are key to making a crusty bread that tastes like Italy. The right mix of ingredients is what makes the bread special.
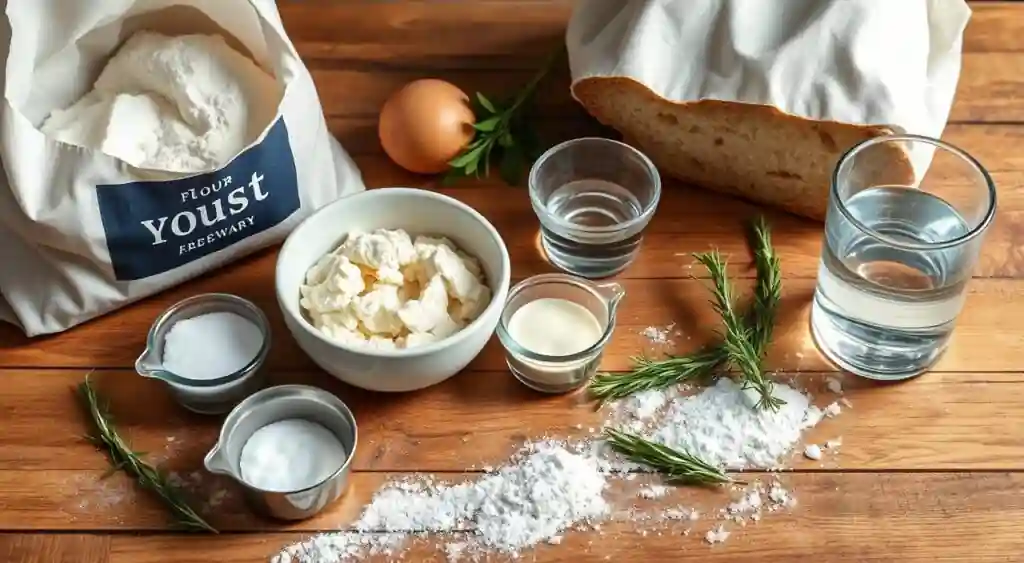
Key Ingredients Breakdown
- All-purpose flour: The main ingredient for the perfect bread texture
- Active dry yeast: Crucial for making the bread rise and taste complex
- Olive oil: Adds a rich, Mediterranean flavor
- Fine sea salt: Boosts the taste and helps control yeast
The quality of your ingredients is what makes your bread great. Experts say using bread flour with high protein is best for a great loaf.
Ingredient Quality and Measurements
| Ingredient | Recommended Quantity | Purpose |
|---|---|---|
| Bread Flour | 4 cups (20 ounces) | Primary structure and texture |
| Active Dry Yeast | 2 1/4 teaspoons | Fermentation and rising |
| Extra Virgin Olive Oil | 2 tablespoons | Flavor and moisture |
| Fine Sea Salt | 1 1/2 teaspoons | Flavor enhancement |
“The secret to great Italian bread lies not just in the recipe, but in the passion and quality of ingredients you choose.” – Italian Bread Master
Water temperature is very important in bread making. Try to use warm water around 110˚F. This helps the yeast work well and makes the bread rise right.
Pro Tips for Ingredient Selection
- Use fresh, high-quality active dry yeast
- Select extra virgin olive oil for authentic flavor
- Measure ingredients precisely for consistent results
- Allow ingredients to reach room temperature before mixing
Choosing the right ingredients is the first step to making delicious Italian bread. It will take you on a taste journey to the Mediterranean.
Required Tools and Equipment for Perfect Results
Making authentic Italian bread is more than just skill. The right tools can make a big difference. They help you get that perfect crusty texture and professional-quality bread.
Essential Basic Kitchen Tools
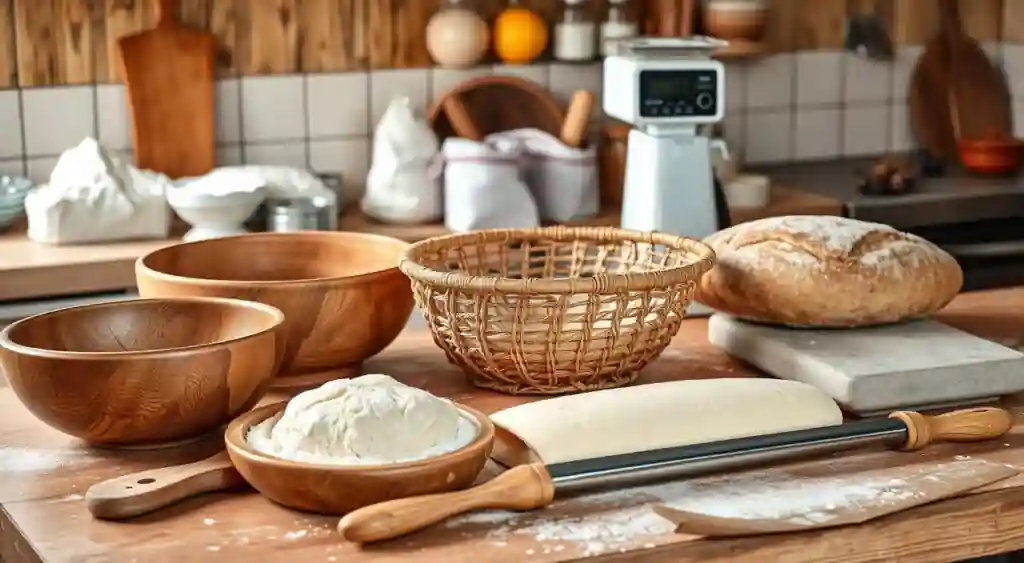
Every home baker needs a few key tools. Your basic toolkit should include:
- Large mixing bowl
- Measuring cups and spoons
- Baking sheet
- Kitchen scale for precise ingredient measurements
- Sharp knife or bread lame for scoring
Advanced Equipment for Serious Bakers
For serious bakers, advanced tools can help a lot. A stand mixer with a dough hook attachment makes kneading easier. A kitchen thermometer ensures your water is just right for yeast.
Baking Surfaces That Make a Difference
The secret to a great crust is your baking surface. A pizza stone or baking stone can make a big difference. They spread heat evenly, giving you that crisp, golden crust everyone loves.

| Tool Category | Recommended Equipment | Purpose |
|---|---|---|
| Mixing | Stand mixer with dough hook | Efficient kneading |
| Temperature Control | Digital kitchen thermometer | Precise yeast activation |
| Baking Surface | Baking stone or pizza stone | Even heat distribution |
“The right tool can transform an average baker into an artisan bread maker.” – Professional Baker’s Wisdom
While professional equipment is helpful, passion and practice are key. They are the most important ingredients in making exceptional Italian bread.
Mastering the Perfect Dough Consistency
Making the perfect yeast-based dough is an art that needs precision and understanding. The journey to perfect Italian bread starts with the right dough consistency. It’s a balance between being sticky and easy to handle.
When working with bread flour techniques, focus on these key elements:
- Texture: The dough should feel slightly tacky but not overly wet
- Elasticity: Smooth and stretchy when properly kneaded
- Hydration: Aim for a 70-80% moisture level for optimal results
“The secret to great bread is in the hands of the baker, not just the ingredients.”
Proofing dough needs careful attention to temperature and timing. The ideal room temperature for dough development is between 75-80°F (24-27°C). During the first rise, your dough should double in size in 1-2 hours. The second rise, after shaping, takes 30-60 minutes.
| Proofing Stage | Temperature | Time |
|---|---|---|
| First Rise | 75-80°F | 1-2 hours |
| Second Rise | 75-80°F | 30-60 minutes |
Watch how your dough behaves. A well-developed dough is smooth, elastic, and bounces back when pressed. Avoid overworking the dough, as it can make the dough tough.
Remember, patience is key in bread making. Let your dough develop flavor and reach the perfect consistency at its own pace.
Step-by-Step Guide to Making Crusty Italian Bread Recipe
Making bread is all about patience and precision. It starts with knowing the key techniques. These turn simple ingredients into delicious crusty Italian bread.
Your bread-making journey has several important steps. Each step is vital for flavor and texture.
Mixing and Kneading Techniques
Begin with top-notch ingredients. For a simple bread, you’ll need:
- 5 cups bread flour (or half bread flour, half wheat flour)
- ½ teaspoon active dry yeast
- Sea salt
- Warm water
Proofing Times and Temperature
Proofing time is key for rich flavors. Keep the temperature around 75°F (24°C) for yeast to work best. Your dough needs:
- First rise: 1-2 hours at room temperature
- Optional cold-proof: 18-72 hours in refrigerator
- Second rise: 30-45 minutes before baking
Shaping Methods for Italian Bread
Shaping affects your bread’s look and feel. Gently stretch and fold the dough. This creates surface tension without harming air pockets. Careful handling ensures a light, airy interior.
“The art of bread making is in the details of technique and temperature.” – Artisan Baker
Your crusty Italian bread bakes at 450°F (232°C). It gets 15 minutes covered, then 20 minutes uncovered. This makes the bread’s crust crispy and the inside soft, making it hard to resist.
Creating the Perfect Crust: Steam and Baking Methods
Making a crunchy bread crust is an art that needs precise techniques and baking science knowledge. The secret to making great Italian bread is mastering the steam method and controlling your oven temperature.
- Preheat your oven to the best temperature for bread.
- Use the steam method during the first 10-15 minutes of baking.
- Know how moisture affects crust formation.
“The perfect crust is a delicate balance between heat, moisture, and technique.” – Professional Baker’s Secret
The steam method is key for a crispy exterior. Introducing steam in the first 10-15 minutes of baking helps create a golden, crackling crust. This is what makes authentic Italian bread so special.
| Baking Technique | Temperature | Steam Method |
|---|---|---|
| Initial Baking | 425°F | Water spray or steam pan |
| Final Baking | 400°F | Reduce moisture |
You can make steam in your home oven in several ways:
- Place a metal pan with boiling water on the bottom rack.
- Spray water directly into the oven with a clean spray bottle.
- Use a Dutch oven with a lid for the first part of baking.
Pro tip: Brush your bread with olive oil before baking. This will help develop the crust and give it a beautiful golden shine.
Remember, patience and practice are essential for mastering the perfect crunchy bread crust. Each bake will bring you closer to bread-making perfection!
Scoring Techniques and Pattern Designs
Bread scoring is a key part of Italian bread culture. It turns a simple loaf into a beautiful work of art. Learning bread scoring methods can make your baking look like a pro’s.
Scoring is more than just looks. It helps the bread grow right during baking and makes it look great. Bakers know each cut tells a story about the bread’s personality.
Traditional Scoring Patterns
Italian bread culture loves many classic scoring designs. These designs show off the baker’s talent:
- The classic single slash – running diagonally across the loaf
- The wheat stalk pattern – multiple parallel cuts
- The cross design – creating a dramatic X-shape
- The batard double slash – two intersecting cuts
Tools for Perfect Scoring
To get pro-level scoring, you need the right tools:
- Sharp lame (bread scoring knife)
- Razor blade
- White rice flour for dusting
- Clean, sharp kitchen scissors
“A well-scored loaf is a baker’s signature—unique and expressive.”
Scoring depth is key. Try for cuts about 1/4 inch deep. They should go through the dough’s surface without making it fall. With practice and patience, you’ll find your own scoring style.
Troubleshooting Common Bread Baking Issues
Bread baking can be tricky, even for experienced home bakers. Knowing common problems helps you make perfect Italian bread every time. Let’s look at the most common challenges you might face.
Identifying Common Bread Baking Problems
- Dense or heavy bread texture
- Poor dough rise
- Uneven baking
- Flat or misshapen loaves
Key Troubleshooting Bread Baking Tips
Yeast is key in bread making. When using Italian bread ingredients, watch out for these issues:
- Inactive Yeast: Always check yeast expiration dates
- Incorrect Water Temperature: Yeast needs warm (not hot) water to activate
- Improper Kneading: Develop gluten through proper technique
“Perfect bread is a balance of science and art” – Professional Baker’s Wisdom
Diagnostic Chart for Bread Baking Challenges
| Problem | Possible Cause | Solution |
|---|---|---|
| Dense Bread | Under-kneading | Knead 10-12 minutes |
| No Rise | Old or inactive yeast | Replace yeast, check temperature |
| Tough Crust | Over-baking | Reduce oven temperature |
Bread baking is a skill that grows with practice. Each mistake teaches you something new about making delicious Italian bread. Keep trying, stay patient, and enjoy the journey of mastering your craft.
Storage Tips and Reheating Methods
Keeping your crusty Italian bread fresh is key. You can enjoy your homemade loaves for days with the right care.
Best Storage Practices
Store your freshly baked bread right to keep it crispy. Room temperature is best for a short time:
- Use a paper bag or bread box to keep it crisp
- Avoid direct sunlight and heat
- Eat within 2-3 days for the best taste
Freezing and Long-Term Preservation
Freezing is great for keeping your bread fresh longer. Here’s how to freeze your crusty Italian bread:
- Let the bread cool down first
- Wrap it in plastic wrap and foil
- Put it in freezer-safe bags
- It can be stored in the freezer for up to 3 months.
Reviving Day-Old Bread
Bringing stale bread back to life is an art. Try these tips:
| Method | Process | Temperature |
|---|---|---|
| Oven Refresh | Sprinkle with water, wrap in foil | 350°F for 5-10 minutes |
| Microwave | Wrap in damp paper towel | 50% power, 10-20 seconds |
| Alternative Uses | Croutons, breadcrumbs, toast | N/A |
“The secret to great bread is not just in the baking, but in how you care for it afterward.” – Artisan Baker’s Wisdom
By using these tips, your homemade Italian loaves will stay fresh and tasty. They’ll bring a bit of Italy into your home.
Serving Suggestions and Pairing Ideas
Your homemade Italian bread is ready to make every meal special! Its versatility lets you turn simple dishes into amazing meals.
Here are some great pairing ideas for your freshly baked Italian bread:
- Classic pasta dishes with rich tomato sauces
- Hearty soups and stews
- Charcuterie boards with cured meats and cheeses
- Mediterranean-style salads
Here are some fun ways to enjoy your bread:
- Bruschetta: Top with fresh tomatoes, basil, and olive oil
- Garlic bread: Brush with garlic-infused butter
- Dipping appetizer: Serve with high-quality olive oil and balsamic vinegar
- Sandwich base for gourmet lunch creations
“A great bread can transform an ordinary meal into an extraordinary dining experience.” – Italian Culinary Tradition
Nutritional tip: Your homemade loaf has about 178 calories per serving. It has 31g of carbs and 5g of protein. It’s not just tasty – it’s also healthy!
Conclusion
Your journey in making artisan bread is more than just learning to bake. It connects you to the rich history of Italian baking. This path requires patience, precision, and passion, which grow with each loaf you make.
Making crusty Italian bread at home is incredibly rewarding. You’ll enjoy the process of watching dough rise and the aroma of fresh bread. With time, you’ll get better at making your bread truly special.
Breadmaking is a mix of science and art. The recipe has been shared 267 times on Facebook, showing its appeal. By mastering the science behind bread, you’ll become a skilled artisan.
Don’t be afraid to try new things and make mistakes. Each loaf has its own story. Your adventure in making authentic Italian bread is just starting, filled with tasty surprises.
FAQ
How difficult is it to make crusty Italian bread at home?
Making crusty Italian bread at home is quite easy, even for beginners. You only need basic ingredients like flour, water, yeast, salt, and olive oil. This simple recipe lets you create a real Italian loaf.
It takes some practice, but the steps are straightforward. Pay close attention to activating the yeast and kneading the dough right.
What type of flour works best for Italian bread?
For authentic Italian bread, use all-purpose flour or Italian Tipo 00 flour. These flours have the right protein and texture for a crusty loaf. Choose high-quality, unbleached flour for the best taste and texture.
How can I ensure my bread develops a crispy crust?
For a crispy crust, create steam in your oven early in baking. Use a pan of water on the bottom rack or spray water into the oven. Also, preheat your baking stone or sheet to 375-425°F and brush the loaf with olive oil before baking.
How long does homemade Italian bread stay fresh?
Enjoy your Italian bread within 1-2 days for the best taste. Store it in a paper bag or bread box at room temperature to keep it crisp. If you need to keep it for a longer period, simply freeze it.
To revive day-old bread, sprinkle it with water and warm it in the oven at 350°F for 5-10 minutes.
Is it possible to make Italian bread without using a stand mixer?
Yes, you can make Italian bread by hand. While a stand mixer makes kneading easier, you can do it manually. Mix the ingredients in a large bowl and knead on a clean surface for 10-15 minutes.
What are some of the most common mistakes to watch out for when baking bread?
Avoid using inactive yeast and not giving the dough enough proofing time. Also, don’t use water that’s too hot or cold, and knead the dough correctly. Make sure to preheat your oven well.
How can I tell if my bread has proofed properly?
Check if your dough is ready by doing the “poke test”. Gently press your finger about half an inch into the dough. If it springs back fast, it’s not ready yet.
If it bounces back slowly when you gently press it, it’s ready to bake.
If it doesn’t spring back at all, it’s over-proofed.
Can I add additional ingredients to my Italian bread?
Yes, you can add herbs like rosemary or thyme, olives, sun-dried tomatoes, or sesame seeds to your bread. But be careful not to add too much. This can affect the dough’s rise and texture.

